Replacing the worn out, stained carpet was the last step in refreshing my Z's interior. This job is pretty tedious, but within the reach of most amateur upholsterers. I had already recovered the door panel trim pieces, the headliner, and the rear speaker covers.
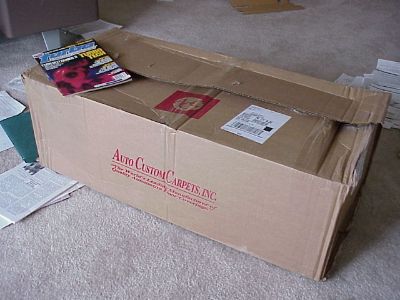
I ordered my carpet from Auto Interior and Upholstery in Lohrville, Indiana. They are a dealer for ACC (Auto Custom Carpet), which is the largest manufacturer of aftermarket, molded auto carpets in the world. Most of the places that sell molded automobile carpets are dealers for ACC, so shop around for the best price. At the very least, the carpet should have the following features:
- meets or exceeds OEM specs
- molded to the floorpan of the specific car make and model
- comes with at least 36 ounce backing under the floor pieces, usually "jute" felt
- binding on any visible edges
- heel pad built into the carpet
Service counts a lot to me, too. My carpet was gray. For reasons I did not understand, the OEM colors ACC had listed for my 1987 300ZX did not include gray as a choice. Supposedly, the choices were blue, black, red and beige. I ended up getting "Misty Gray" # 73 as the closest match. This was after John, the owner of Auto Interior and Upholstery, insisted that I first mail him a sample of carpet I cut from my hatch piece so that he could find the closest match possible. I appreciated that sort of conscientiousness. Not only that, but John's price was about 40% cheaper than the price quoted on ACC's own web site. ACC is more interested in supplying their distributors then dealing one on one with consumers, so that is why shopping around can save you money. John says he moves a lot of ACC carpet, which is why he can give such a good price. Also, there is a good general instruction sheet on John's website about how to install car carpet that I recommend in addition to following any of the tips here.
Tools needed
- metric socket set
- putty knife
- carpet cutter knife or very sharp folding knife
- spray rust inhibitor
- screwdrivers
- vacuum cleaner
- detail scissors
- pick
Difficulty: Three and a half out of five. I worked slow and methodical in order to avoid making a fatal cut in the carpet that might have had me wishing I could start over or hire a professional.
Time needed: Holy crap! I alloted a half-day for this job and it ended up taking me about 14 hours, but I went slow.
 The carpet was $230 shipped. Since the OEM car mats were NLA (no longer available), I also ordered matching front car mats for an extra $33. The carpet was $230 shipped. Since the OEM car mats were NLA (no longer available), I also ordered matching front car mats for an extra $33.
Strip out the interior. Move the seats all the way forward and then all the way back to access the four bolts that secure each seat to the floor. Disconnect the seat belt alarm wire underneath before lifting the seats out of the car. Remove the T-tops to make clearing the seats out of the car easier. Watch your back. The driver seat was pretty heavy and the working position was awkward. Remove the door sills, kick panels (covers the fusebox on the driver's side), and the risers behind the door sills toward the rear of the car. Use Ziplock bags to store the different fasteners and label them.
The "clam shell" storage area behind the seats needs to come out. Open the lid and unscrew the handle from the inside. Pop out the six, round plastic fasteners holding the front lip of the hatch carpet from inside the storage compartment. Remove the rear hatch carpet.
 Continue to remove the clam shell storage compartment by taking out the bottom half. These screws also hold down the back edge of the passenger area carpet. Continue to remove the clam shell storage compartment by taking out the bottom half. These screws also hold down the back edge of the passenger area carpet.
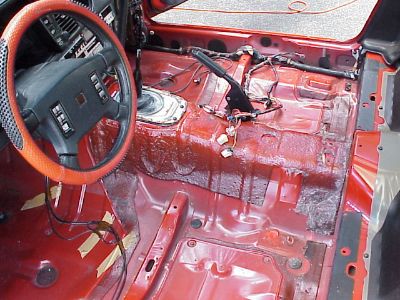
Remove the center console. There are a couple of prawl pieces that hide some screws, shown by the red arrows.
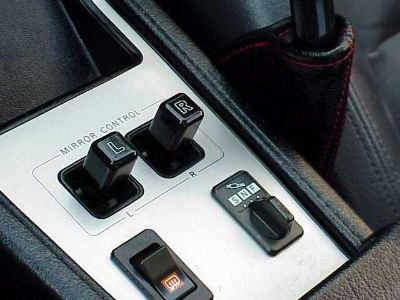
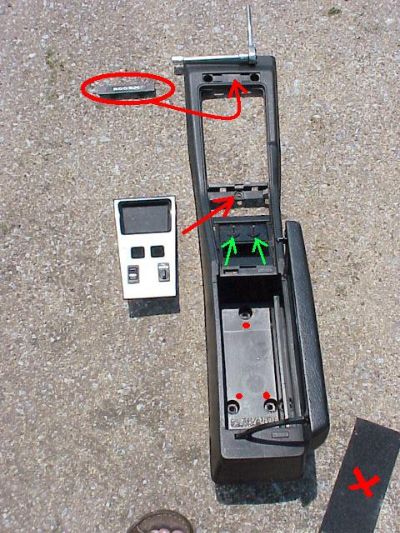 Pry the pieces shown on the left up with a thin blade pocket knife. The bottom of the center glove box has three screws marked with red dots. They are accessed by peeling up the felt bottom marked with a red X. The green arrows point to the side mirror power switches. I furbar'd these by removing the knobs that covered them. Just leave the knobs in place and remove the switches with the center console as one piece. Naturally, there are a few wire connectors underneath that have to be undone. Pry the pieces shown on the left up with a thin blade pocket knife. The bottom of the center glove box has three screws marked with red dots. They are accessed by peeling up the felt bottom marked with a red X. The green arrows point to the side mirror power switches. I furbar'd these by removing the knobs that covered them. Just leave the knobs in place and remove the switches with the center console as one piece. Naturally, there are a few wire connectors underneath that have to be undone.
If there is an extra white connector with the connnectors that go to the defroster and shock adjuster switches, it is for the headlight washer option. Once the seats, center console, door sills, risers, kick panels, shifter knob and rear storage compartment are out, the passenger area carpet can be removed.
This is ideally an outdoor, summer job, that requires a lot of "spreading out" space.
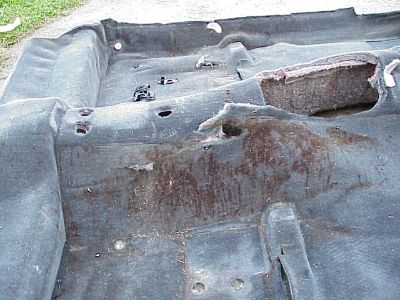 Here is the old nasty carpet out of the car, with 17 years of coffee stains, lol. Be careful when you are pulling the old carpet out. I left a piece of skin on the stock carpet, which had some heavy-duty staples pushed through it at the door sills. Keep the old carpet to look at for a template until the job is finished. Here is the old nasty carpet out of the car, with 17 years of coffee stains, lol. Be careful when you are pulling the old carpet out. I left a piece of skin on the stock carpet, which had some heavy-duty staples pushed through it at the door sills. Keep the old carpet to look at for a template until the job is finished.
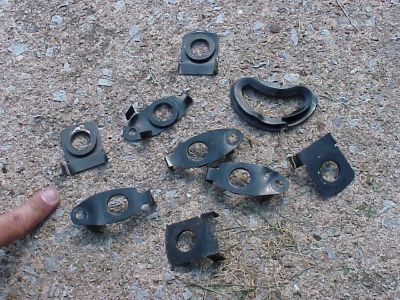
There were a pile of grommets in the old carpet that I removed and planned on reusing with the new install. My girlfriend threw them out by accident. I'm not sure if positioning the grommet pieces in the new carpet would've been worth the effort. I did manage to salvage the small plastic trim piece that went around the hatch release. That's the different looking curvy piece in the right upper corner. The rest of the pieces were metal and went around the seat bolts.
Some of the metal edges along the door sills and opening were very sharp, too. I had lots of little cuts and scrapes when this job was done. Make sure your tetanus shots are up to date, lol.
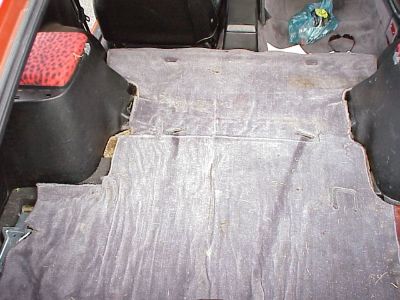 The original hatch piece was severely shrunken, stained and mishapen. The stock tool kit can be seen peeking through the lower left corner. The original hatch piece was severely shrunken, stained and mishapen. The stock tool kit can be seen peeking through the lower left corner.
 The stick shift does not have to be removed, but the shift knob does. Hopefully, the knob will simply twist off. I slit the New carpet down the middle almost the entire length of the center "hump." The stick shift does not have to be removed, but the shift knob does. Hopefully, the knob will simply twist off. I slit the New carpet down the middle almost the entire length of the center "hump."
The very back edge of the new carpet behind the center console shows, and should not be cut.
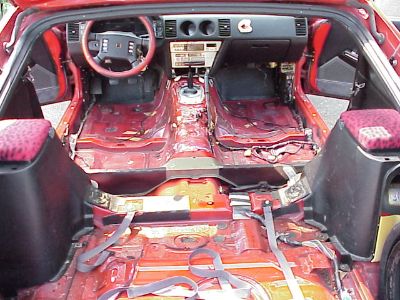 The shock towers (with the red leopard speaker covers) didn't need to come out. I just loosened the front screw on each one so I could tuck the edge of the passenger compartment carpet under them. The shock towers (with the red leopard speaker covers) didn't need to come out. I just loosened the front screw on each one so I could tuck the edge of the passenger compartment carpet under them.
Once the interior of the car was down to bare metal, I scraped any chunks off and cleaned the metal with a wire brush, and then vacuumed. I did not have any rust cancer, except for one small area of surface rust near the rear corner, driver side. I sprayed Dupli-Color Rust Fix on it.
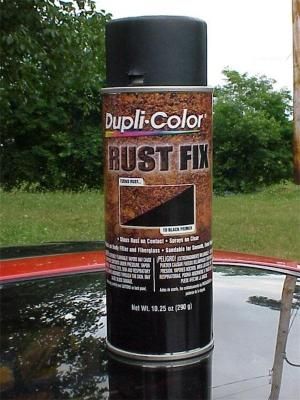 This stuff goes on clear, then chemically converts rust into black primer, it doesn't just cover or coat the rust. There are other brands, but I would use a rust converter, and not simply paint or primer. This stuff goes on clear, then chemically converts rust into black primer, it doesn't just cover or coat the rust. There are other brands, but I would use a rust converter, and not simply paint or primer.
 There was a chunk missing and some pieces torn in my rear hatch insulation, under the carpet. I used Great Stuff to fill the hole. There was a chunk missing and some pieces torn in my rear hatch insulation, under the carpet. I used Great Stuff to fill the hole.
The new carpet was easier to handle after it was laid out in the sun for a couple of hours which softened it up, and got rid of some of the creases from being folded in the box.
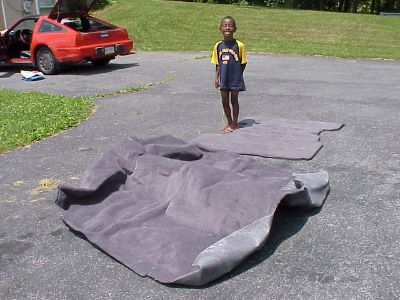 The new pieces had thinner plastic backing that the OEM carpet. I'm not sure I could've cut the new carpet by hand if it were as thick as the OEM. The new pieces had thinner plastic backing that the OEM carpet. I'm not sure I could've cut the new carpet by hand if it were as thick as the OEM.
Even though the new carpet was thinner that the orginal, the finished product still looked great.
The overall size of the pieces was very good. I did not have to do any trimming at the edges. Cutting all the holes and slits in the right place was hard enough. The plain carpet was not so tough, but most of the cuts had to be made through the carpet AND the jute backing. The jute was super tough and would dull my knife in just a few strokes. So have plenty of blades on hand if using a carpet knife, or a good whet stone to resharpen a folding knife.
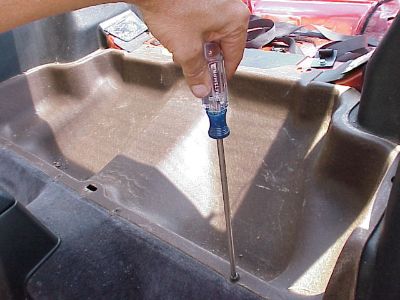
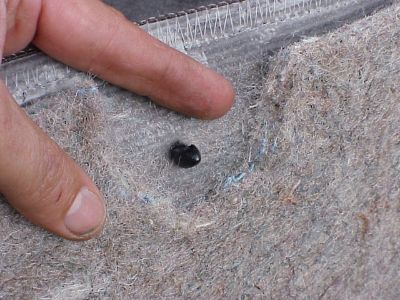
 This tool was indespensible, and was basically the equivalent of an ice pick. I used it to probe for the bolt holes before making my cuts. Here I am probing the driver, front, outward seat hole. This tool was indespensible, and was basically the equivalent of an ice pick. I used it to probe for the bolt holes before making my cuts. Here I am probing the driver, front, outward seat hole.
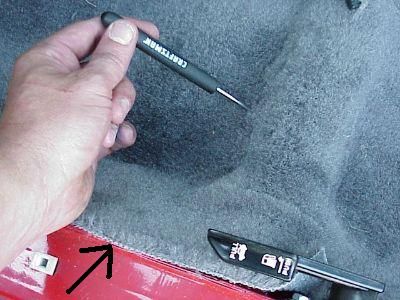
The carpet edge shown above by the black arrow needs to make it all the way up to the door sill on BOTH sides of the car as shown because the trim piece that covers the door sill has only about a half an inch of overlap.
 Cut X's, not holes in the carpet for the seat bolts. Once the bolt hole has been located with a probe, cut an X over and as close to it as possible. Then fold in the triangle closest over the hole. Extend the cuts to make the triangle larger, if needed. Cut X's, not holes in the carpet for the seat bolts. Once the bolt hole has been located with a probe, cut an X over and as close to it as possible. Then fold in the triangle closest over the hole. Extend the cuts to make the triangle larger, if needed.
Leave the other three triangles of the X closed and you won't see the cuts. This was the best tip I learned from doing the job myself. I was so much better at probing, marking, cutting, and finding the holes under the carpet by the end of the job. Go slow at first. Line up the carpet as many times as it takes before making the cut. What's that old saying, "measure twice, cut once?" For me, it was closer to "measure five times, cut once."
Another tip that took me half the job to figure out was trimming the carpet holes after I poked through them. When the bolts or screws were pushed through a hole in the carpet, they pick up the carpet fuzz, carpet glue, carpet backing, and jute fibers, which made them very hard, if not impossible, to sink into the thread holes. I used small detail scissors and my knife to clean up the holes a bit and trim off any excess material, especially on the backside of the carpet, before pushing the screws through. This helped a lot in threading the screws and bolts into their holes.
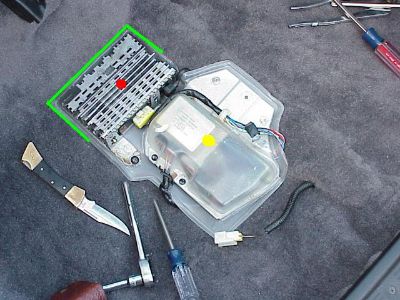 I had clearance issues with the stock stuff that was bolted under the passenger seat. The red dot is on the stereo amp, and the yellow dot is part of the burglar alarm system. They both sat in a plastic tray. My new carpet was so tight that it created a sort of "hammock" for these pieces, that lifted them a little bit off the floor. I had clearance issues with the stock stuff that was bolted under the passenger seat. The red dot is on the stereo amp, and the yellow dot is part of the burglar alarm system. They both sat in a plastic tray. My new carpet was so tight that it created a sort of "hammock" for these pieces, that lifted them a little bit off the floor.
This caused the passenger seat to bump in to the stereo amp, and I lost my forward seat adjustment. That was not acceptable. The way I remedied this was to make additional cuts in the carpet, shown by the green lines, which allowed the amp to sink deeper into the floor. The cuts never show as they are under the white plastic tray, which is under the seat.
The hatch was so much easier to do than the passenger compartment. I installed the hatch carpet out of the car, by fitting it onto the top half of the clam shell storage lid first. Then I reinstalled the storage lid with the carpet already attached. To make sure I had the hatch carpet centered just right, I laid out the carpet and lid in the hatch a few times first. I probably could have fitted the hatch carpet directly in the car but I had already installed my seats so there wasn't enough room to work.
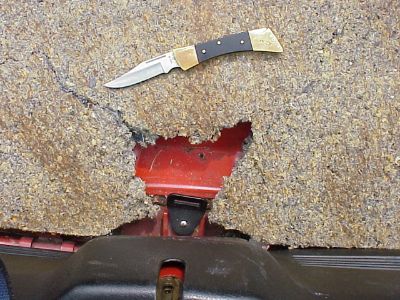
Cutting holes in the carpet was three times harder if I had to cut through the jute backing. I found that for the front edge of the hatch piece carpet, the jute was simply to thick to reuse the stock fasteners unless I made cut-outs, as shown in the picture.
 I used scissors to cut the jute. A knife won't work. As an unplanned bonus, by doing it this way, the carpet had a mild "tucked" look that ended giving a nice finished appearance to the install. I used scissors to cut the jute. A knife won't work. As an unplanned bonus, by doing it this way, the carpet had a mild "tucked" look that ended giving a nice finished appearance to the install.
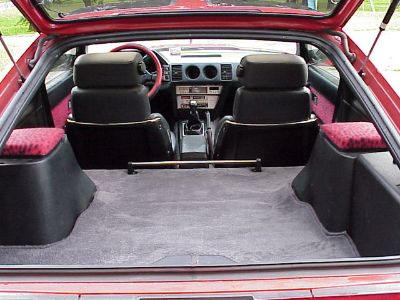
 Here are some finished shots. All in all, I was happy the way the carpet install came out, but the job was a lot harder to do than I had anticipated. I think at one point I had four Band-Aids on me from this job, including one on my right big toe. I had to clean blood of the carpet more than once, lolam. Here are some finished shots. All in all, I was happy the way the carpet install came out, but the job was a lot harder to do than I had anticipated. I think at one point I had four Band-Aids on me from this job, including one on my right big toe. I had to clean blood of the carpet more than once, lolam.
I think a professional could have made the carpet look a little tighter, but so far no one has said anything other than it looks, "Great!"
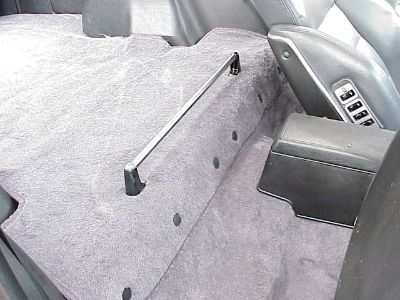
 Here is the back edge of the passenger carpet, fitted under the front lip of the clam shell storage compartment, behind the seats. Here is the back edge of the passenger carpet, fitted under the front lip of the clam shell storage compartment, behind the seats.
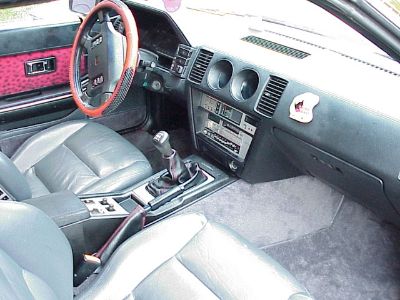
 Also, since I had the center console out, I installed Italian black leather shifter and E-brake boots, with red stitching, courtesy of Courtesy Nissan. They had two sets for sale, and you're looking at one of them ;c) Also, since I had the center console out, I installed Italian black leather shifter and E-brake boots, with red stitching, courtesy of Courtesy Nissan. They had two sets for sale, and you're looking at one of them ;c)
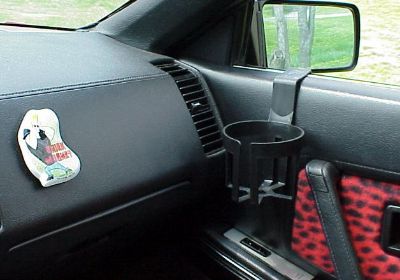 a few extra interior shots a few extra interior shots
 Johnny Bravo Johnny Bravo
 headliner, looking straight up from the center console headliner, looking straight up from the center console
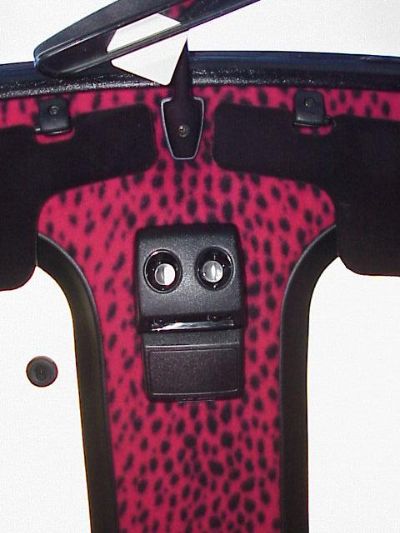
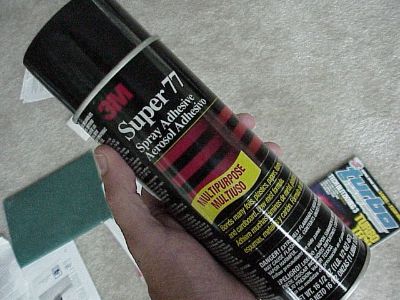 This product was used to stick the red leopard fleece onto my interior pieces. Peeps have E-mailed me that this product isn't strong enough, that I should've used the "80" formulation instead. This product was used to stick the red leopard fleece onto my interior pieces. Peeps have E-mailed me that this product isn't strong enough, that I should've used the "80" formulation instead.
I did this job back in 2002 and not one piece has come loose.
 New Z-Tek mirror knobs (NLA). New Z-Tek mirror knobs (NLA).
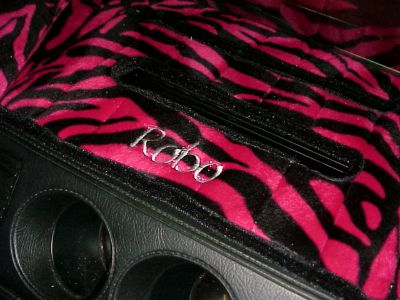
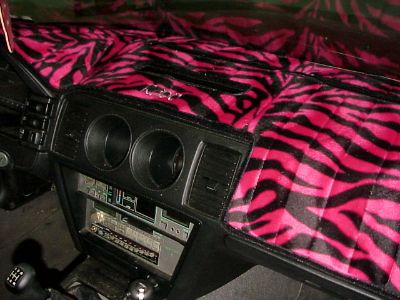 Added an eBay monogrammed red tiger dash cover Added an eBay monogrammed red tiger dash cover
 Pimpin' ain't easy. Pimpin' ain't easy.
|