One day my passenger window would not go down, it was stuck in the up position. I could hear the motor clicking when I used either the driver or passenger window switch, but no motion. The window switches in the doors on BOTH sides have to be in place and operational to complete the circuit for the windows to work. Since I could hear the window motor clicking with the same sound regardless of which door switch I used, I thought it was a correct assumption that the switches were good. Either I was lucky or good because a new window motor did fix my problem.
I bought a used passenger window motor in the classifieds on z31.com. There is a way to test the new motor before pulling out the old motor and scissors frame, shown below, so read through this entire article first. This pic shows the unit that must come out of the door in order to replace the motor. The job is made much easier by having a second set of hands to hold and move the window glass up and down.
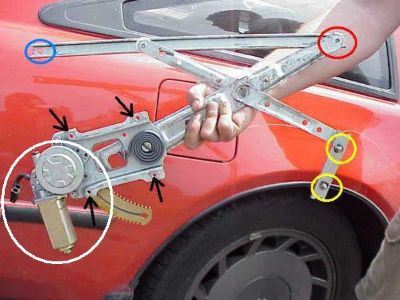 Circles and arrows are color matched to the photos below. The motor is circled in white, with the electrical connector hanging off. Circles and arrows are color matched to the photos below. The motor is circled in white, with the electrical connector hanging off.
The regulator is attached to the inside of the door by bolts going through the holes next to the black arrows, and nuts attached to the studs circled in yellow. The regulator is attached to the glass by screws at the red and blue circles.
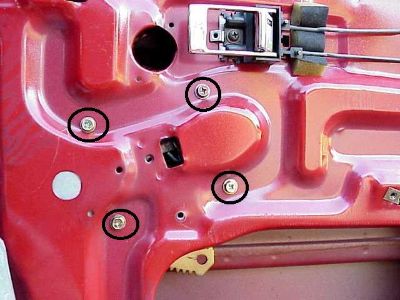 These are the bolts that hold the window motor to door. They correspond to the black arrows above. The large cut-out hole in the right lower corner is where the motor and frame leave and enter the door after all the bolts are removed. This takes some wiggling. These are the bolts that hold the window motor to door. They correspond to the black arrows above. The large cut-out hole in the right lower corner is where the motor and frame leave and enter the door after all the bolts are removed. This takes some wiggling.
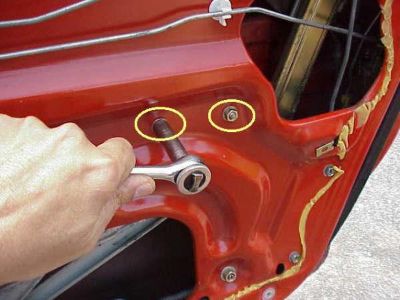 These nuts correspond to the yellow circles in the above pic. These nuts correspond to the yellow circles in the above pic.
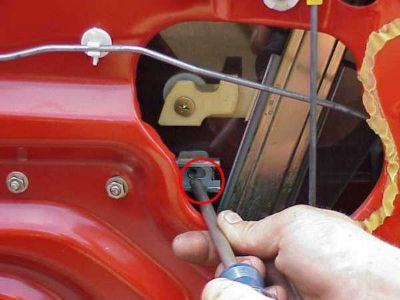 Rear glass attachment is accessed with the window up. Rear glass attachment is accessed with the window up.
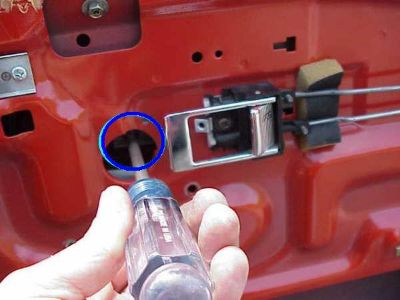 Front glass attachment is accessed with the window down. Front glass attachment is accessed with the window down.
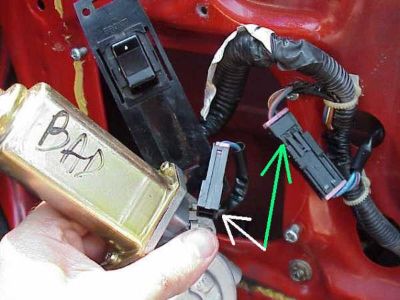 The window switch should be reconnected to test the motor before the door panel is reinstalled. Also, the motor can be tested before installation by plugging into the connector shown at the green arrow. The window switch should be reconnected to test the motor before the door panel is reinstalled. Also, the motor can be tested before installation by plugging into the connector shown at the green arrow.
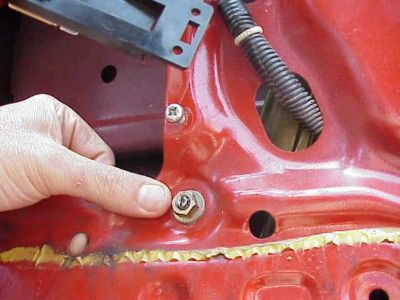 There is a threaded screw inside the nut. This is a rail adjustment nut. The nut is loosened and the screw turned to move the glass in and out, not up and down. I had to loosen this nut to get the motor out. There is a threaded screw inside the nut. This is a rail adjustment nut. The nut is loosened and the screw turned to move the glass in and out, not up and down. I had to loosen this nut to get the motor out.
 I also had to loosen these to nuts to get the motor out. The left nut is just a stop for the glass. The one on the right is for the left rail (screw is out already). I also had to loosen these to nuts to get the motor out. The left nut is just a stop for the glass. The one on the right is for the left rail (screw is out already).
After the motor and regulator are out of the door, the motor is removed from the regulator and replaced with the new motor. The window motor is attached to the regulator by three machine screws. We had to use PB penetrating catalyst, Channel Lock pliers, and a screw driver at the same time to separate the motor from the regulator, once the entire assembly was out of the car. The regulator is spring loaded, and will move once the motor is removed. You can clamp the regulator in place before removing the motor or just force them back together at the same time you tighten the motor back on to the scissors frame. The spring falls off if you tip the regulator with the motor out.
The key on easily getting the entire assembly back in the door was to have the regulator all the way in the DOWN position. This accomplished two things. The entire assembly was then bent at an angle which shortened its length and made slipping it through the cut out much easier. Also, the toothed slide on the scissor frame has a stop on it that keeps the motor gear from coming off in the down position. The motor gear will run off the scissor frame in the up position before it is attached to the glass. I found this out the hard way, had to remove the motor and frame twice when I ran the gear off the frame by running the motor up before it was attached to the glass. I also was not aware of this when removing the assembly the first time, while the bad motor was still attached, and this may have saved my having to loosen the frame glass. At any rate, a little wiggling and patience and you can get the assembly in and out of the large cut out at the bottom rear part of the door.
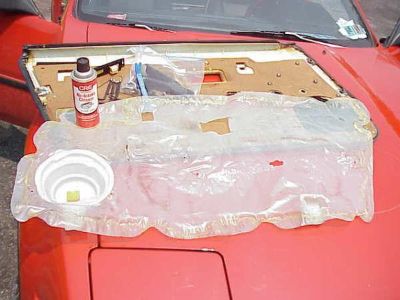 I mainly liked reusing the plastic door liner because of the rear speaker shield in the lower left corner. I mainly liked reusing the plastic door liner because of the rear speaker shield in the lower left corner.
The speaker shield keeps the back of the speakers dry when rain drips down between the glass and door.
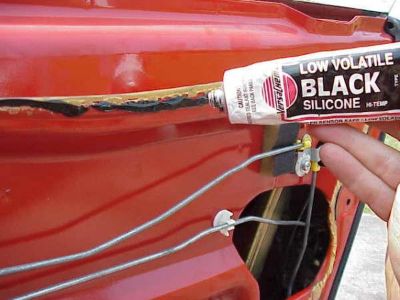 I just traced near the old yellow adhesive with some black RTV silicone. I let the silicone set up for ten minutes or so, then stuck the plastic liner back in place. I just traced near the old yellow adhesive with some black RTV silicone. I let the silicone set up for ten minutes or so, then stuck the plastic liner back in place.
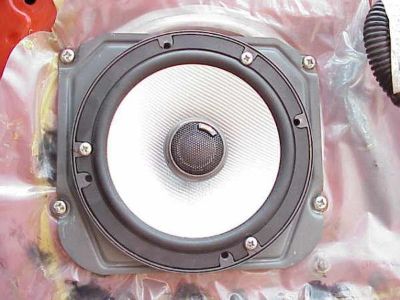 I've been pretty happy with these Polk 6-1/2" db650 speakers as stock replacements. I've been pretty happy with these Polk 6-1/2" db650 speakers as stock replacements.
| 