After twenty years of having never once seen my digital temperature gauge above mid-range, my baby Z started running hot. In fact, she used to run cold in the winter when coasting down hills and mountains. I never let her run hot into the red zone, but the digital temp gauge started creeping upward into new territory over a period of several weeks.
Read the conclusions at the end of this article before tackling your Z's overheating problem. In retrospect, the order I replaced the parts shown here was probably not the most logical approach, lolam.
I assumed my temperature gauge to be working by the way the car responded after cold starts, and under a load once the car was warmed up. The car would run the hottest going up a steep hill. I used to be able to drive to work and the car would not get fully warmed up. Now she was at operating temp before I was half-way through my commute. Also, the oil temperature gauge was reading higher than usual. I figured the odds of both gauges giving falsely high readings at the same time were pretty remote. I could also feel the increase in heat coming off the engine bay. I concluded that my car was running hotter than usual.
The first time I noticed the temp gauge creeping up was at idle. I immediately pulled into a nearby K-Mart and bought two gallons of antifreeze. I popped the hood in the parking lot, but the system was still full of coolant. I could not squeeze in more than a few ounces of antifreeze at the radiator cap. The overflow tank was at the correct level. The system was holding pressure as tested by squeezing the large rubber radiator hoses with the car warmed up, running, and the radiator cap on tight. I wiggled the fan on its shaft looking for signs of a bad water pump and it seemed tight. There were no leaks or strange noises with the engine running.
All the parts on my cooling system were original - the water pump, hoses, radiator, radiator cap, thermostat and fan clutch. I should've put a new water pump in when the timing belt was done. At least I could justify changing out any of the above parts based on age alone, if nothing else, lolam.
At first, the car would run cooler in motion or if I rev'd the engine at idle. Also, with the engine hot and turned off, I felt the radiator fan spun too easily by hand, although I did not have anything for comparison. I concluded that my fan clutch was worn out. There needs to be enough drag on the fan clutch to get the fan up to speed. As the problem declared itself more over the next few weeks, the car also started running too warm under load. The car heater seemed to be intermittently blowing very hot, then lukewarm by itself, without any adjustments to the climate control.
Driving with the hood cracked (not recommended) would cool the car down noticably. Running the heater also helped cool off the car a bar or two on the digital temperature gauge. Not sure what this proved other than it allowed me to make it eighty miles home one night from Baltimore.

I decided to swap out the fan clutch first. Sticker shock - list price for a new one was $228.
My fan clutch part number was 21082-01P04. Please note that there was a model change in 1987. My car was built in 4/87. There can be different numbers for the same parts for 1987 z31's. For example, I believe there are two kinds of water pumps for 1987 turbo z31's.
To fan clutch can be removed with one 10 mm long wrench. Leave the belts and pullies alone. In fact, the fan belt should be tight enough to keep the pulley from turning while loosening the four bolts. If the pulley turns while trying to loosen or tighten the nuts, reposition the wrench so the force vector with the wrench is less perpendicular to the hub. Once the fan and clutch are out of the car, a 10 mm socket separates the fan from the clutch.
Try to not let the fan pulley slide too far off the studs once the four nuts are removed. Have a long flexible extension grabber handy or be prepared to jack the car and remove the splash shield to retrieve the dropped nuts and washers. I have small hands, but the working quarters were tight and no matter how careful I was, I dropped the nuts and washers a few times. A magnetic wand works best for getting the four small washers off the fan pulley.
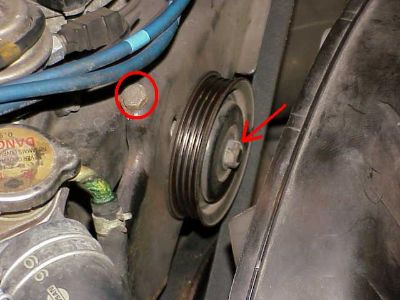
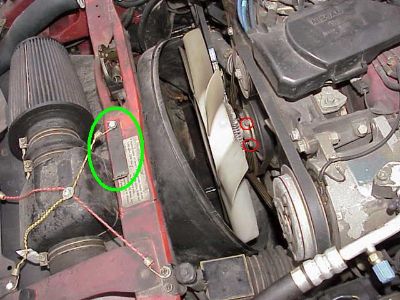 The radiator shroud is slid forward out of the way by undoing the bracket circled in green. Two of the four 10 mm bolts holding the fan clutch on the pulley are circled in red. The radiator shroud is slid forward out of the way by undoing the bracket circled in green. Two of the four 10 mm bolts holding the fan clutch on the pulley are circled in red.
For some reason, the fan clutch nuts were easiest to access when they were in between noon and six o'clock position. I turned the fan by putting a wrench on the power steering pulley nut or bumping the starter with the ignition key. Do not start the car with loose pieces under the hood.
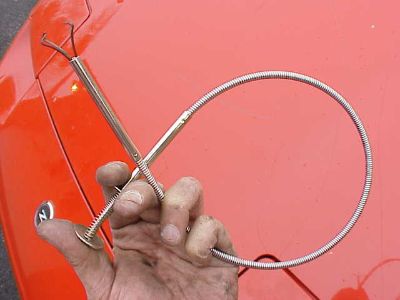 Need one of these flexible grabber tools and a wand magnet to retrieve nuts and washers that drop down to the lower splash shield. Need one of these flexible grabber tools and a wand magnet to retrieve nuts and washers that drop down to the lower splash shield.
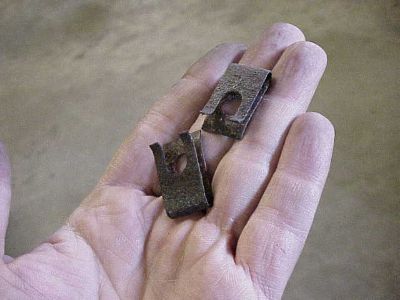 There are two clips on the bottom edge of the radiator shroud holding it in. There are two clips on the bottom edge of the radiator shroud holding it in.
 Fan, clutch and radiator shroud are out of the car. My Rube Goldberg air intake can be seen in the corner left lower corner which works perfectly. Fan, clutch and radiator shroud are out of the car. My Rube Goldberg air intake can be seen in the corner left lower corner which works perfectly.
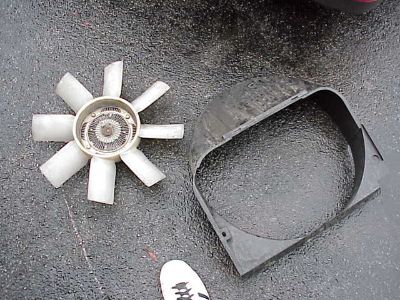 Fan attached to clutch, and radiator shroud. Fan attached to clutch, and radiator shroud.
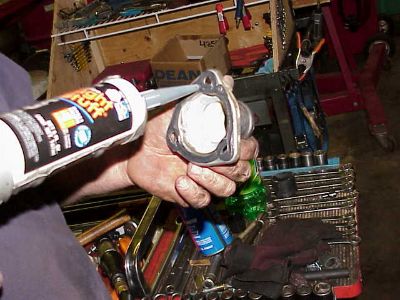
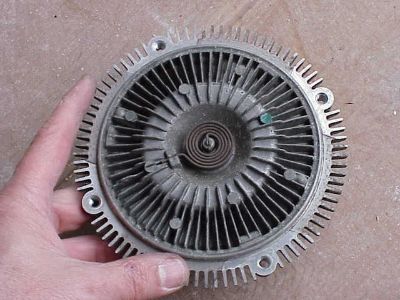 Front of fan clutch. I was able to separate fan from clutch by carefully standing on the fan with one foot, and using a socket wrench. Front of fan clutch. I was able to separate fan from clutch by carefully standing on the fan with one foot, and using a socket wrench.
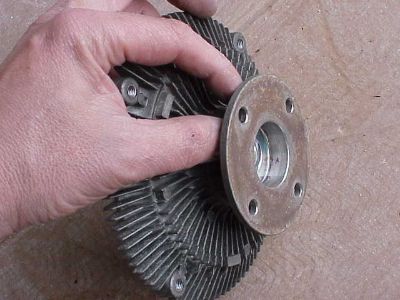 Back of fan clutch. Back of fan clutch.

My car was still running hot after I changed out the fan clutch. I decided to change out the thermostat next. Prob should have done this first. For a overheating car that is not leaking, a good bet would be a thermostat that is not opening fully. The Nissan OEM part number for my thermostat was 21200-42L01, retail price less than twenty bucks.
Nissan began using liquid sealant in place of a gasket for the thermostat on z31 engines built in 2/87 and later. The gasket for the thermostat can still be ordered and used if desired. Nissan charges over $24 for their sealant in a tube. There are many gasket sealant products on the shelves at the auto parts store that work just as well for much less.
My Haynes service manual said that some of the work for this job needed to be done from underneath, with the car on a lift. Not so, this job was done all from above.
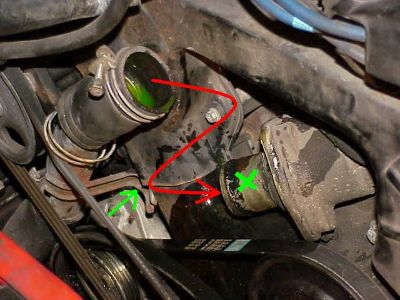
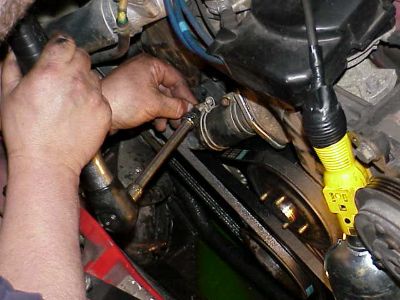
The thermostat is located in a housing, at the front of the engine, behind the idler tension pulley mounting bracket, at the end of the lower radiator hose.
This first pic is at the front top of the engine, behind the fan.
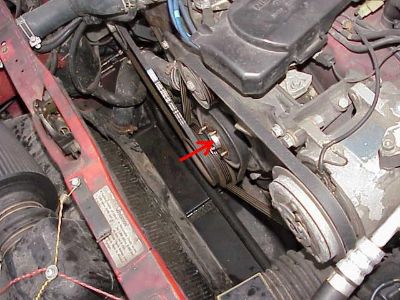
 Slide the belt off of the front of the idler tension pulley by loosening the adjuster bolt in the red circle. The pulley needs to come completely off in order to get to the bottom bolt on the mounting bracket. Slide the belt off of the front of the idler tension pulley by loosening the adjuster bolt in the red circle. The pulley needs to come completely off in order to get to the bottom bolt on the mounting bracket.
The idler pulley has a front and back, spacer and washer, so keep the pieces in order. Clean the pulley thoroughly and spray the bearings with lithium grease.
 There are three 12 mm bolts holding the idler pulley mounting bracket in place. Remove these bolts and take the bracket out of the car. Those are my friend's hands, Mike the mechanic. There are three 12 mm bolts holding the idler pulley mounting bracket in place. Remove these bolts and take the bracket out of the car. Those are my friend's hands, Mike the mechanic.
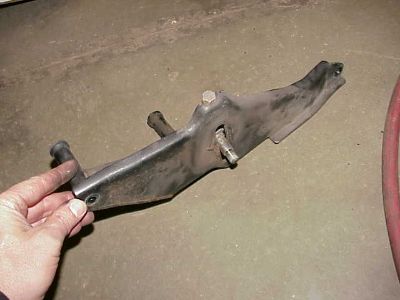 The idler mounting bracket out of the car. The idler mounting bracket out of the car.
Remove the fan clutch, fan and radiator shroud as in the first section. The fan can be removed before the idler pulley and bracket, personal preference, doesn't matter.
The lower radiator pipe is attached to the thermostat housing. First remove a 12 mm mounting bolt for the radiator hardpipe shown at the green arrow. This will allow the short rubber radiator hose to be pulled off the thermostat housing. Loosen the clamps on the short rubber radiator hose, grunt and twist, pull the lower radiator hose off the thermostat housing, shown by the green X.
The lower half of the thermostat housing has three, 12 mm bolts holding it in place. Remove these, then the housing can then be gently tapped loose as it will be stuck on from old gasket sealer. The thermostat should fall out. I lost about a half a gallon of antifreeze at this point from the upper engine block. The upper half of the thermostat housing stayed attached to the car.
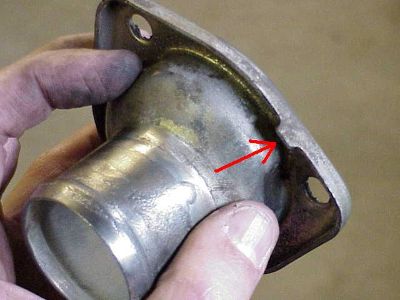 The thermostat housing has a top, as shown by the tab next to the arrow. Clean the housing, especially at its mating surface and where the radiator hose slips back on. The thermostat housing has a top, as shown by the tab next to the arrow. Clean the housing, especially at its mating surface and where the radiator hose slips back on.
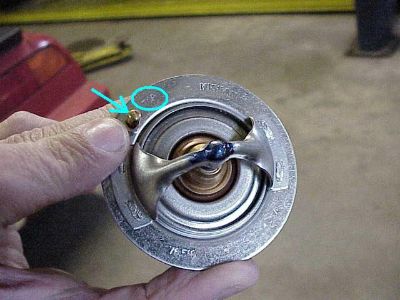 The new thermostat has a front and back, top and bottom. The word "TOP" is etched in the blue circle, next to the gold knob. This side of the thermostat faces the radiator. The new thermostat has a front and back, top and bottom. The word "TOP" is etched in the blue circle, next to the gold knob. This side of the thermostat faces the radiator.
I like NAPA "Right Stuff" gasket sealer that sets in one minute. A few small dabs on the back of the thermostat held it in place on the upper half of the thermostat housing still attached to the engine. Don't let any of the sealer get into the moving parts of the thermostat.
 The same "Right Stuff" on the mating surface of the lower half of the thermostat housing. The thermostat is already back in the engine, and this housing will cover the thermostat. The same "Right Stuff" on the mating surface of the lower half of the thermostat housing. The thermostat is already back in the engine, and this housing will cover the thermostat.
 Putting the pieces back together. Putting the pieces back together.
Top coolant off at the radiator cap inlet, and leave cap off. Start engine, turn heater on high. Fill overflow tank to proper level. Run engine until warm and flow of coolant is seen (thermostat opens) through inlet. Continue topping off at the inlet until no air or bubbles are seen burping out. Squeeze soft upper radiator hose gently, coolant should top out at the radiator cap inlet. Double check level in overflow tank. Put radiator cap on tightly. Recheck the fluid level in the overflow tank upon the next cold start and fill to max level mark.
My car's temperature dropped back to normal again after I replaced the thermostat.

The foremost take-home message here is to put in a new water pump when your Z is getting a timing belt change. The expense in this is the time and labor, not the cost of the water pump. Otherwise, without an obvious leak or faulty water pump as the cause, systematically changing out the least to most expensive parts of the cooling system makes sense if the car is overheating.
One suggested order is:
1) Clean and flush the radiator. Check the radiator fins to make sure they are not clogged with debris. I don't believe a flush will typically cure an overheating problem but one might get lucky. Can't hurt. Pay attention to the quality of fluid that comes out of the flush at first. If it's clean and green, then a corroded, clogged radiator is probably not the problem. If the radiator is so clogged as to cause overheating without leaking, then the radiator should probably still be replaced, further down this list.
2) Replace the radiator cap. Cheap and easy. Develop a feel for the normal pressure of a sealed coolant system by squeezing the large rubber hose near the radiator cap with the car warmed up and running. Use Nissan OEM. I don't recommend high pressure radiator caps except for racing applications. High pressure radiator caps can bring out leaks by increasing the pressure of the coolant system.
3) Replace the thermostat. Cheap, two hours labor, fairly easy.
4) Replace the fan clutch. Expensive, tight quarters, pretty easy.
5) Replace the radiator. Expensive, front bumper has to come off, kinda easy.
6) Replace the water pump. The water pump usually shows direct signs that it is bad such as noise, leak, or wobbly fan. Relatively cheap part, expensive in time and labor, not easy. Best timed with other routine maintenance such as a timing belt change.
|