I tried to get out of my car and something snapped in the door handle. The kind of snap where I instantly knew the door ain't gonna work again until it's fixed, probably with a new part. The door would not open from the inside any longer.
The door panels on a z31 are a lot easier to remove than the z32. The only real "trick" are the four screws hidden under the armrest. Start with the window down. If needed, the window can be made operational after the door panel is removed by plugging the window switch back into its connector at the door. The window switch can be removed with the arm rest still attached to the door, but I don't recommend it. Much safer for the switch to remove the door handle first.
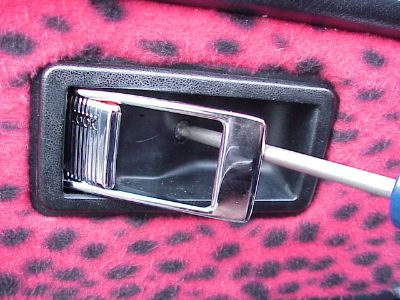
First, remove the door handle garnish that is held in place by a single screw, and a couple of plastic clips on the rear edge, toward the lock side. The trim is easier to pry off if the door is unlocked. BTW, if you have any comments about the red leopard fleece trim, at least read the z31 page above this one first.
There are four small round trim pieces covering the screws that hold the armrest in place.
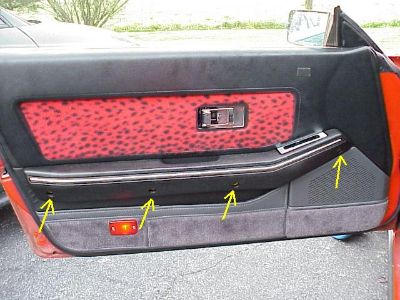
Pry off the trim covers and remove the screws. The little round covers are long inside, and a little tough to pry loose. Much easier if the ambient temperature is on the warm side.
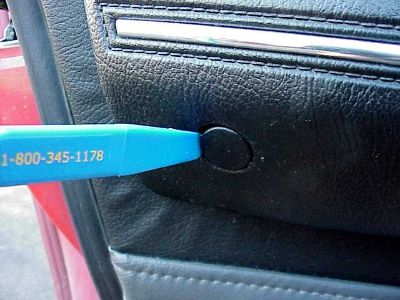 I put a light coating of Vaseline inside the holes before replacing these screw covers. Makes their removal the next time A LOT easier. I put a light coating of Vaseline inside the holes before replacing these screw covers. Makes their removal the next time A LOT easier.
Once the armrest screws are out, release the electrical connector to the window switch.
 This picture also shows a side view of the power window switch, and the trim piece covering it. These pieces can be removed from the handle, and the switch reconnected to the door panel if the window needs to be made operational while the door panel is off. This picture also shows a side view of the power window switch, and the trim piece covering it. These pieces can be removed from the handle, and the switch reconnected to the door panel if the window needs to be made operational while the door panel is off.
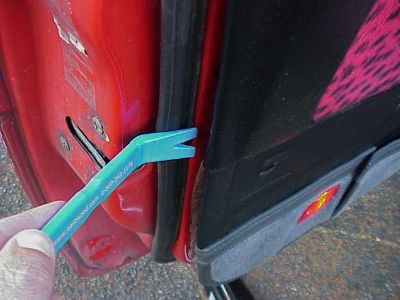
The door panel can now be gently pried free as it is only being held in place by plastic trim fasteners. There are roughly seven evenly spaced around the sides and bottom. There is also a wire connected to the small red light near the bottom of the panel that has to be disconnected. You can do this as the last step after you lift the panel off, or when working along the bottom edge, freeing the fasteners.The top edge of the panel rests on top of the door frame, so you lift the panel up to get it off the door once the fasteners are undone.
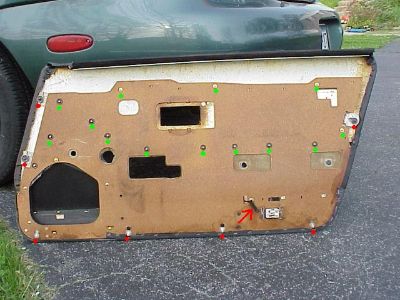
Here is the backside of the driver's side panel. The red dots show the fasteners that had to be pried loose to remove the panel from the door. The green dots show all the lock washers and Phillips screws that must be removed if you want to disassemble the panel further. The only reason to do that is to recover the panel trim piece, done in red leopard fleece on my door. Otherwise, set the door panel aside and leave it until it is time to put things back together. The red arrow shows the elastic strap that hold the map pocket in place. This is usually ready for replacement, or at least to be snugged up to take up some of the slack.
Back to the door itself, sure enough, one of the plastic levers on the door handle had snapped off. I was surprised to find that the piece was mostly made of plastic, except for the handle itself. Oh well, it worked for seventeen years.
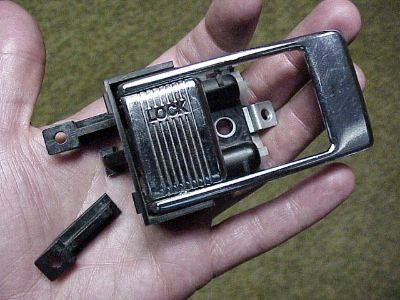 The handle was held in place by one screw, and a bracket that slipped into a hole cut in the door. A new driver's door handle cost $42, part number 80671-01P00. The handle was held in place by one screw, and a bracket that slipped into a hole cut in the door. A new driver's door handle cost $42, part number 80671-01P00.
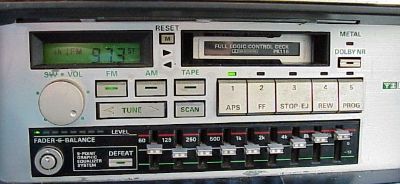
I decided that this would be a good time to replace my speakers, since they were the original stockers. I already had my stock HU (head unit) reconditioned a while back by "Wild Bill," a guy who specializes in z31 stereos. The AM/FM cassette HU was pretty slick for its time, with a built in graphic equalizer, so I decided to keep it.
Once I saw the condition of my original speakers, I was surprised they were still making any sort of decent sound at all. The speaker foam edge that was supposed to attach the woofer to the metal housing was completely gone, decomposed on all four speakers. My finger shows the gap this created. This represents the most common problem with old automotive and home speakers - the gradual deterioration of the poly-foam suspension. Obviously, this is not good for bass response and causes distortion in the lower frequencies. "Speaker foam rot" is caused by age and time, and not by any specific abuse.
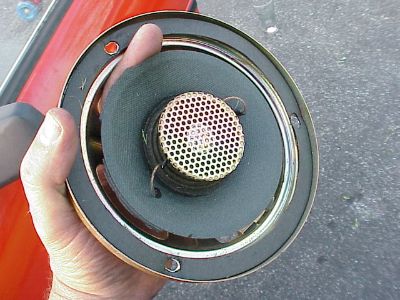 There is not supposed to be a space where my finger is poking through this stock speaker. The cardboard woofer edge that my finger is touching was also rotting. There is not supposed to be a space where my finger is poking through this stock speaker. The cardboard woofer edge that my finger is touching was also rotting.
Since I removed the door panel right away to get the door open, I had to drive it that way for some time while I ordered the speakers. The wind caused the plastic liner to come detached except where it was still being held in place by the speaker bracket.
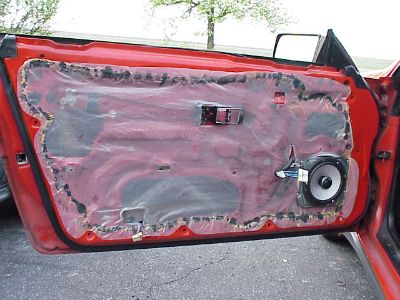
So I reattached the plastic liner with some RTV black silicone. I used a thin bead around the door, let it "skin" for about ten minutes, then just pressed the liner back in place. This is not an issue when just installing speakers, since the liner should remain in place on its own.
Here is a close-up of the new speaker, a 6 1/2" round Polk db650. The mounting holes and gasket lined up perfectly with the old bracket. Crutchfield supplied an adapter harness for the speaker wiring, but it would be almost as easy to simply cut and splice.
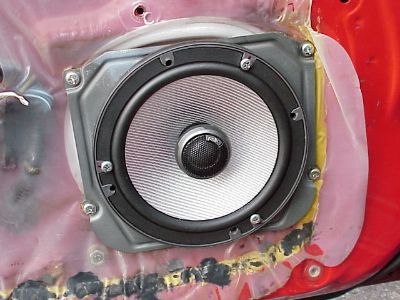 You can see the orginal yellow adhesive for the plastic liner in this pic, with the black RTV silicone I ended up using on top of it. You can see the orginal yellow adhesive for the plastic liner in this pic, with the black RTV silicone I ended up using on top of it.
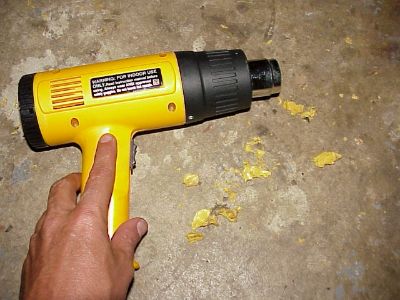 Before I used the black RTV silicone, I had the brilliant idea of trying to reheat the seventeen year old yellow glue with a heat gun and reattach the liner that way. Before I used the black RTV silicone, I had the brilliant idea of trying to reheat the seventeen year old yellow glue with a heat gun and reattach the liner that way.
All that succeeded in doing was to turn the old yellow stuff into dry, chunky crumbs that fell onto the garage floor, lolam.
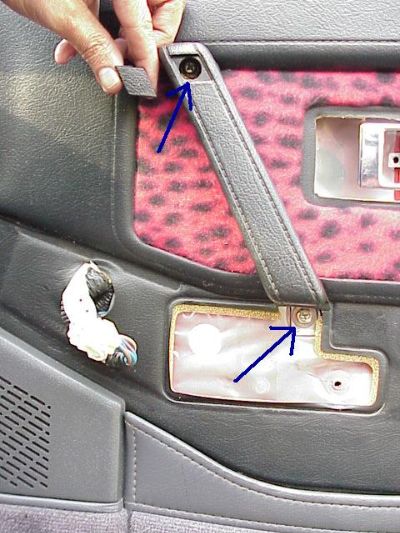
The only difference with removal of the passenger door panel is that there is a handle with two screws that must be removed. The top screw is hidden by a small, square trim piece shown held in my fingers. The handle is removed after the armrest, and therefore is put back in before the armrest.
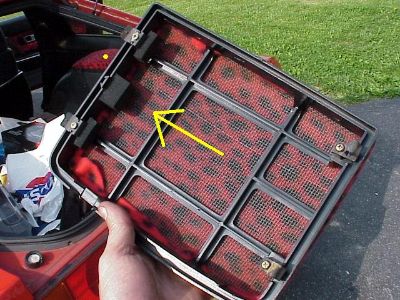
The rear speakers are very easy to replace, unless you don't know where they are, lol. The rear speaker covers are over the shock towers, on top of the rear wheel wells inside the hatch. They pry off, rear edge first. The underside of the driver's side cover is shown, with the yellow arrow pointing toward the front of the speaker cover. The passenger side speaker cover is shown in the background with a yellow dot on it. If only they made the z32 rear speakers as easy to access.
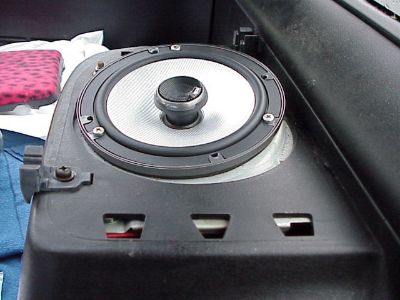
Here is a picture of the new driver's side rear speaker installed. The pic is taken from behind the driver's seat, with the camera pointing toward the rear hatch.
 Not surprisingly, the new sound was fantastic in comparison to the seventeen year old speakers with terminal foam rot, even with the stock head unit. Not surprisingly, the new sound was fantastic in comparison to the seventeen year old speakers with terminal foam rot, even with the stock head unit.
| 