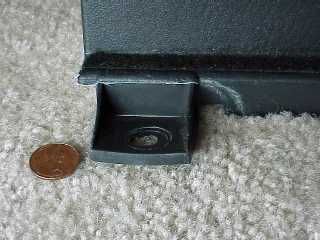
This is a little fab repair, nothing fancy. One of the plastic mounting brackets snapped off my interior, center, plastic hatch trim piece. This is the trim piece that covers access to the reverse lights from inside the hatch. The brackets fit over studs on the trunk floor. These brackets get snapped off easily because the temptation when working with this interior rear panel is to just remove the two plastic thumbscrews near the top, and then bend the panel back in towards the hatch area. Snap!
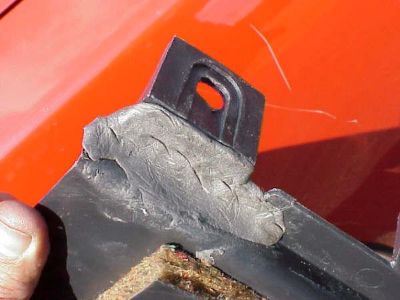
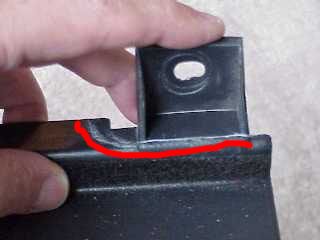 Anywho, I super-glued the bracket back in place. Super glue alone is not enough, but I did this in order to hold the piece in place for this next step. The red line shows where the piece was originally snapped off. Anywho, I super-glued the bracket back in place. Super glue alone is not enough, but I did this in order to hold the piece in place for this next step. The red line shows where the piece was originally snapped off.
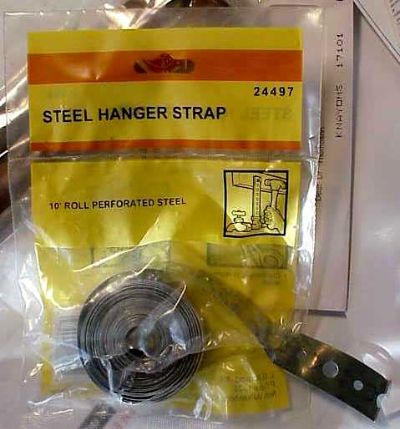 I cut a small piece of steel hanger strap. This stuff comes in handy for a variety of sturdy fab repairs You can tell from the label I bought it in the plumbing section. The strap can be cut, bent, and twisted for a variety of purposes, and attached with the holes that already come predrilled through it. I cut a small piece of steel hanger strap. This stuff comes in handy for a variety of sturdy fab repairs You can tell from the label I bought it in the plumbing section. The strap can be cut, bent, and twisted for a variety of purposes, and attached with the holes that already come predrilled through it.
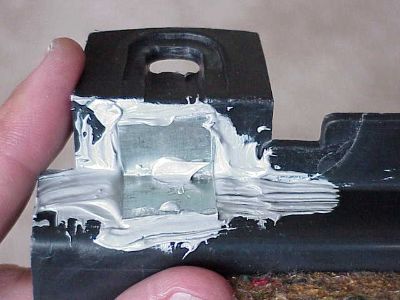 For this repair, I simply cut a small piece of the strap and bent it at a right angle. Then, I used two-part epoxy to splint the piece across the fracture line, on the back side of the panel where it wouldn't show. Very strong fix, reinstalled the panel without any problems. :c) For this repair, I simply cut a small piece of the strap and bent it at a right angle. Then, I used two-part epoxy to splint the piece across the fracture line, on the back side of the panel where it wouldn't show. Very strong fix, reinstalled the panel without any problems. :c)
 Here is the finished product from the front side. The repair is completely hidden once the panel is re-installed. This helps keeps the interior panels snug and quiet. Here is the finished product from the front side. The repair is completely hidden once the panel is re-installed. This helps keeps the interior panels snug and quiet.

|