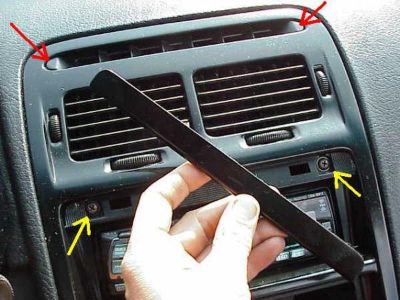
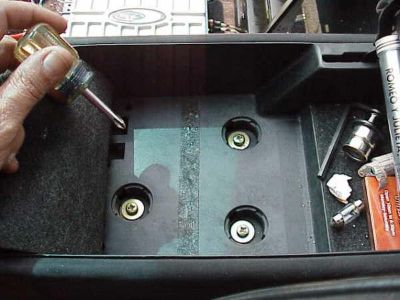
 The trim piece in my hand covers the screws at the yellow arrows. I purposely broke off the clips on the back of this trim piece. Then I used Velcro to hold the trim piece in place. The trim piece in my hand covers the screws at the yellow arrows. I purposely broke off the clips on the back of this trim piece. Then I used Velcro to hold the trim piece in place.
This made it much easier to remove and replace the trim piece, which I seem to do a lot. There are two more screws under the trim tabs at the red arrows.
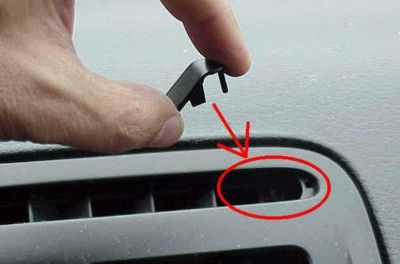 Close-up of the right red arrow above. These trim tabs can be removed with your thumbnail. They break easily. There is a screw under each one. Close-up of the right red arrow above. These trim tabs can be removed with your thumbnail. They break easily. There is a screw under each one.
After the four screws above are removed, the center bezel holding the air vents and surrounding the stereo head unit can be pried out. There are a couple of prawl clips on the sides near the bottom of the bezel.
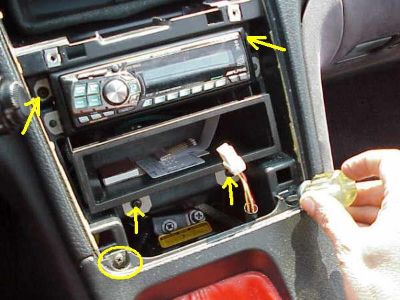 The screw at the yellow arrows only have to be removed if you are doing stereo or DIN work. I'm removing the front screws for the gear shift cover piece. The screw at the yellow arrows only have to be removed if you are doing stereo or DIN work. I'm removing the front screws for the gear shift cover piece.
The gear shift knob can be tough to unscrew. If yours is stuck, you will probably need a new one to replace it by the time you get the old one off. A rag wrapped around the knob and a pipe wrench works as good as anything.
Open the lid on the ashtray. Lift ashtray out. Remove one screw in corner under ashtray, shown by the red dot below.
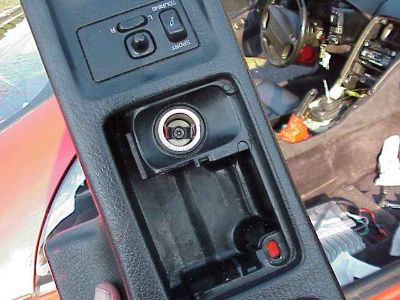 All the screws so far have been the same size. All the screws so far have been the same size.
This piece above had four separate electical connectors underneath - shock adjuster switch, mirror switch, cigarette lighter and illumination light. There may be an extra connector at the harness for headlight washers that were standard on Canadian models.
 Lift the "carpet" at the bottom of the center console glove box. Then gently lift and pull this piece forward to remove it. Lift the "carpet" at the bottom of the center console glove box. Then gently lift and pull this piece forward to remove it.
The back edge of this piece is wedged into place under another trim piece, but not fastened otherwise.
|