Read this site's Disclaimer first. I treat airbags like they are bombs that can kill you. If you do not feel comfortable then do not mess around with the air bag. I believe the driver side airbag showed up in these cars in 1992. I owned a '92 and it had an airbag. The steering wheels from '92-'96 are interchangeable. The '90-'91 steering wheels besides not having airbags have three spokes instead of four.
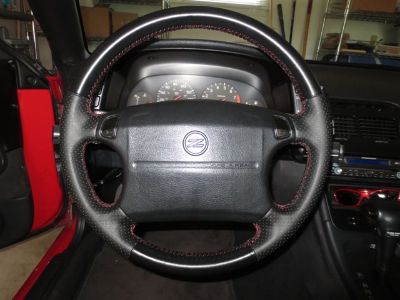
My old steering wheel was the shabbiest part of the entire car. First of all, my Z was handicapped equipped when I bought it, so there was two clamp indents from the steering wheel knob.
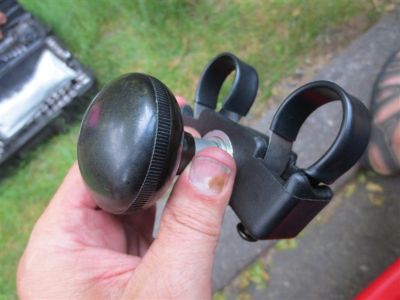
 The dents from the spinner knob install as part of the adaptive equipment The dents from the spinner knob install as part of the adaptive equipment
Plus, the leather skin was flaking off in wispy thin little pieces every time I touched the wheel which is probably why there was a one-piece wrap covering the wheel.
Special tools needed - Torx T-50 Tamper Resistant bit, MUST BE THE KIND WITH DIMPLE in the end otherwise will not work. Also, some Loctite for Torx bolts.
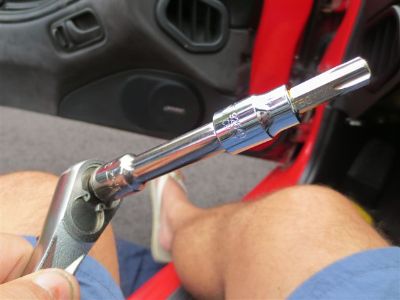
 Like this, with a dimple or hole in the tip. Like this, with a dimple or hole in the tip.
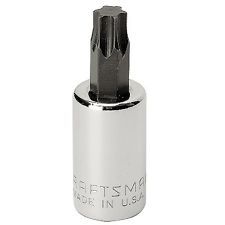 Not this, flat at the tip, without a hole. Not this, flat at the tip, without a hole.
The T-50 does not have to be a socket drive like above, but that is what I used. Torx bits come as Allen wrenches, screwdrivers, any way imaginable.
Steering wheel puller or pulley puller can be used but I did not need it. Lots of wiggling and a couple of drops of PB Blaster worked fine.
Disconnect the battery first and let sit for 15 minutes before starting work. This is mainly so that you do not have to reprogram the airbag system after the reinstall, which is supposedly a PITA. Plus, supposedly there are capacitors connected to the airbag that store a charge. I feel safer when there is no juice in the car when working on an airbag. I like Bernie's rule of thumb (so you don't lose your thumbs) which is always keep the logo on the airbag facing you; point the metal side of the air bag pointed away from you at all times. Shout out to Bernie Bilski whose help on my Z Projects is the best out there. I disconnected then covered the positive battery cable end with a rag so there was no chance power accidentally reaching the air bag during the install. Before disconnecting the battery I suggest you put the drivers seat all the way back for room to work.
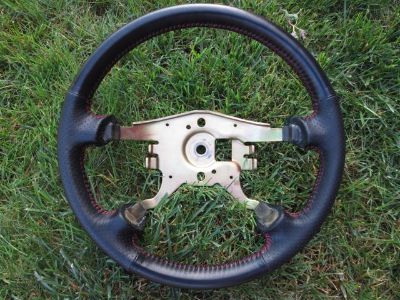 My new wheel was an old wheel "blank" that I paid to have recovered. My new wheel was an old wheel "blank" that I paid to have recovered.
 Good work. Good work.
 The extra leather is shift boot and E-brake boot I ordered at the same time, also with red stitching. I bought the single Torx bit on-line for less than $2.50 shipped. The extra leather is shift boot and E-brake boot I ordered at the same time, also with red stitching. I bought the single Torx bit on-line for less than $2.50 shipped.
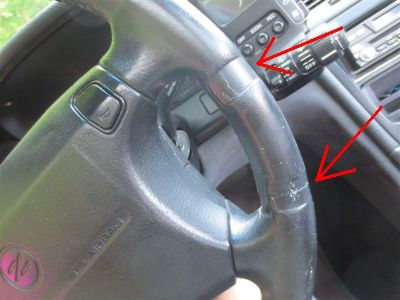
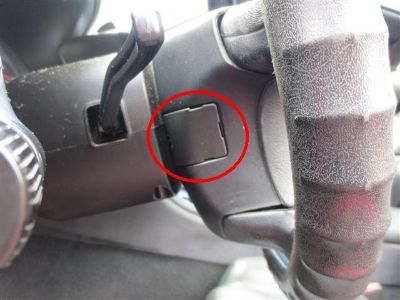 There are one of these trim panels on each side of steering wheel. Easy to pry off, then remove Torx T-50 bolt underneath. There are one of these trim panels on each side of steering wheel. Easy to pry off, then remove Torx T-50 bolt underneath.
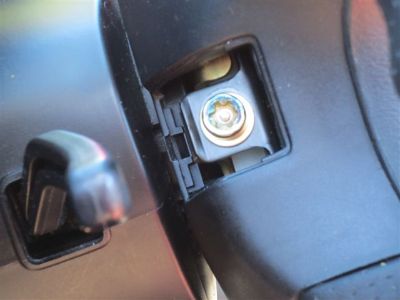 Close-up of above pic with trim cover removed showing Torx T-50 bolt. There is one on each side of the wheel. These two "tamper resistant" bolts are what hold the airbag to the steering wheel. There are also two electrical connectors under another trim panel bottom side of wheel. Close-up of above pic with trim cover removed showing Torx T-50 bolt. There is one on each side of the wheel. These two "tamper resistant" bolts are what hold the airbag to the steering wheel. There are also two electrical connectors under another trim panel bottom side of wheel.
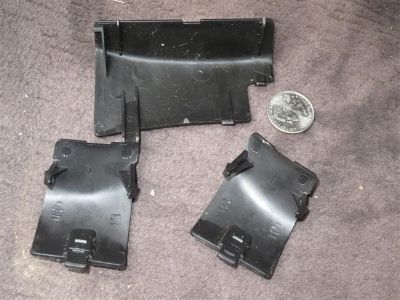 The three trim pieces that need to come off the steering wheel. Picture is too small, but the bottom two pieces are labeled L and R. The three trim pieces that need to come off the steering wheel. Picture is too small, but the bottom two pieces are labeled L and R.
 Torx T-50 bolts. Blue on threads is Loctite. Torx T-50 bolts. Blue on threads is Loctite.
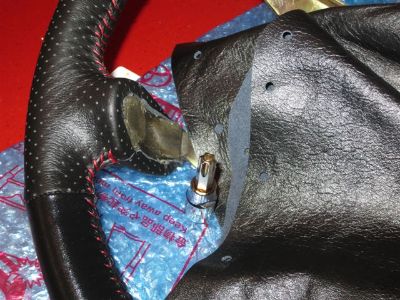
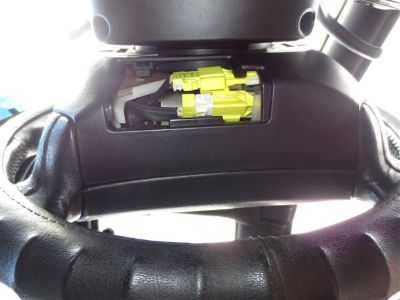 Underneath steering wheel, looking straight up. Easy to remove trim panel, then disconnect these two yellow connectors. A little tight but I did it with fingers only. See update below, easier to unplug these connectors AFTER loosening air bag, leave trim cover in place. Underneath steering wheel, looking straight up. Easy to remove trim panel, then disconnect these two yellow connectors. A little tight but I did it with fingers only. See update below, easier to unplug these connectors AFTER loosening air bag, leave trim cover in place.
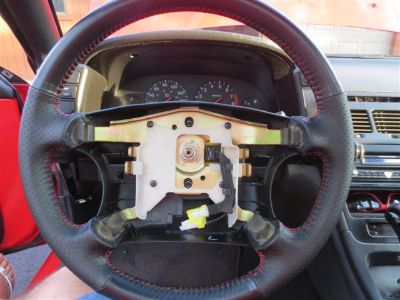
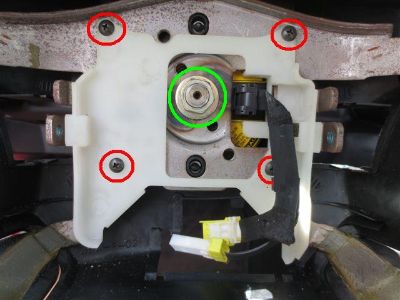 Air bag easily lifted out after the two Torx bolts were removed. Be gentle to the connectors and the wiring "tape." Remove the four circled screws. Take off the white plastic piece. I used a 3/4" socket on the center nut circled in green, probably should have used metric. Air bag easily lifted out after the two Torx bolts were removed. Be gentle to the connectors and the wiring "tape." Remove the four circled screws. Take off the white plastic piece. I used a 3/4" socket on the center nut circled in green, probably should have used metric.
See update below. Center nut is 19 mm.
I recommend a beefier 3/4 inch socket drive handle instead of 3/8 inch to use on the center nut. The extra torque is needed. A short extension or tall socket is needed to get to the nut. After the center nut is removed the wheel is only being held in place by friction from the center spline.
Set the airbag aside on passenger side floor, Z logo facing up. Treat the airbag like the bomb it is. They are safe to handle, but do not tempt fate. One of these exact airbags fell off the top shelf in my garage over six feet onto a concrete floor and nothing happened. But I store the airbag in a container on the bottom shelf now.
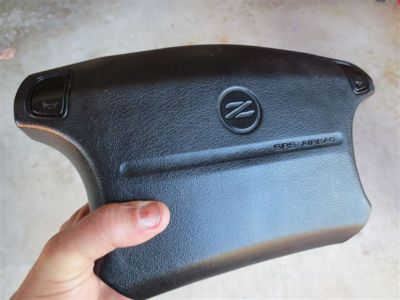 One z32 driver side airbag. One z32 driver side airbag.
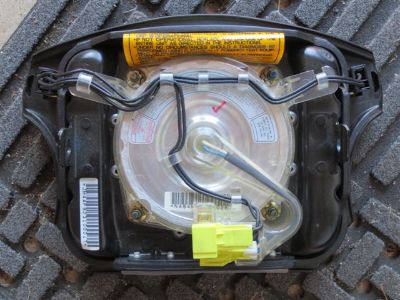 The backside of the airbag. The two yellow connectors at the bottom hook up to the steering wheel column. The backside of the airbag. The two yellow connectors at the bottom hook up to the steering wheel column.
 Pulling the old steering wheel off took about 15 minutes. I did a lot of wiggling and tapping with a rubber mallet and the wheel did not budge. I thought I was going to have to make a trip to the auto parts store for a steering wheel puller. But I decided to try a couple of drops of PB Blaster first. Pulling the old steering wheel off took about 15 minutes. I did a lot of wiggling and tapping with a rubber mallet and the wheel did not budge. I thought I was going to have to make a trip to the auto parts store for a steering wheel puller. But I decided to try a couple of drops of PB Blaster first.
A few pulls later the wheel popped loose suddenly in one motion, I almost chipped a tooth. BEFORE you take the old wheel off, make sure you know the position so you put the new wheel on in the exact same position, which can be a little tricky during all the tugging and pulling. Next time I will probably make some sort of mark.
Another way way is to make sure the front tires are pointing straight ahead and center the new wheel.
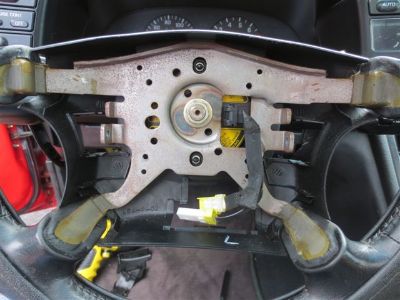
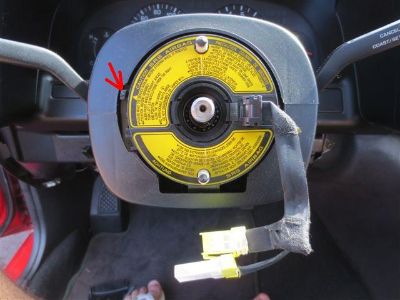 Read the instructions on this yellow clock spring wheel. Note the arrow marker. I did not move this piece, I left it alone. Read the instructions on this yellow clock spring wheel. Note the arrow marker. I did not move this piece, I left it alone.
This is what is printed on the yellow clock spring above:
I was able to reconnect the electrical connectors above to the airbag before bolting the airbag back in place.
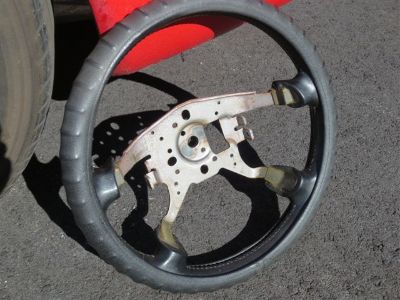 My old steering wheel. The leather underneath the cover was shot. This will make a good blank for someone else's new wheel. My old steering wheel. The leather underneath the cover was shot. This will make a good blank for someone else's new wheel.
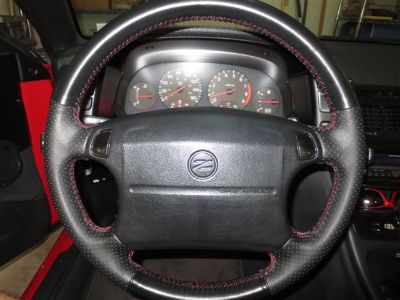
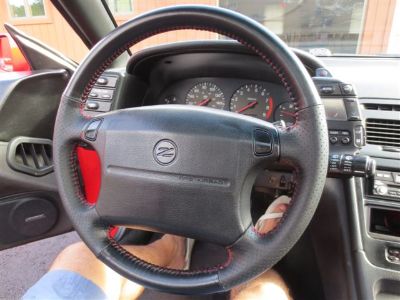 New steering wheel installed. New steering wheel installed.
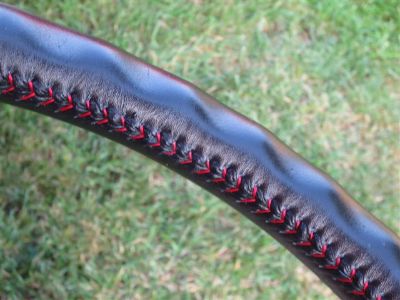
 This lighting better shows the contrast between the smooth and perforated leather. Turned out the steering wheel was slightly off center to the left as shown in this picture (my front wheels were straight). See update below. This lighting better shows the contrast between the smooth and perforated leather. Turned out the steering wheel was slightly off center to the left as shown in this picture (my front wheels were straight). See update below.
Reconnect battery. Check horns. Make sure air bag light on dash comes on then turns off when the ignition is turned on.

Steering wheel was one spline off-center to the left, so I straightened it in < 15 minutes, not counting disconnecting the battery and letting car sit first.
Easier to unplug the airbag connectors after pulling airbag loose from wheel. The center steering wheel nut is 19mm, not 3/4 inch.
I rotated wheel one spline clockwise. Perfect alignment.
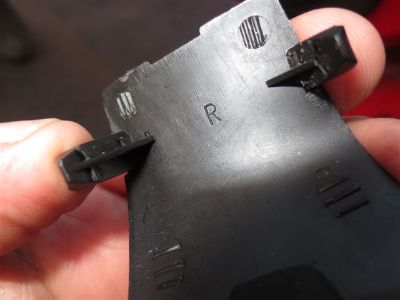 Better pic of inside trim piece covering Torx bolt shows "R" for right. Other side is labeled, you guessed it, "L." Better pic of inside trim piece covering Torx bolt shows "R" for right. Other side is labeled, you guessed it, "L."
 The white plastic cover and black plastic back piece can stay on the wheel since the same wheel is going back on. Moved wheel over one spline, no need to remove the white plastic cover. The white plastic cover and black plastic back piece can stay on the wheel since the same wheel is going back on. Moved wheel over one spline, no need to remove the white plastic cover.
 Pointless to say the steering wheel is straight unless the front wheels are also pointed straight, but trust me, the wheel is now on straight. Pointless to say the steering wheel is straight unless the front wheels are also pointed straight, but trust me, the wheel is now on straight.
|